This blog is basically about the process we have to follow to add a new post in WordPress using the Gutenberg editor. As we all know the Gutenberg editor is developed to simplify the editing process. It does so by eliminating the tedious job of coding or manual editing.
Gutenberg is designed to make WordPress site-building easy and it does so using editing blocks and hence called WordPress block editor. By its virtue, it has been easy to create attractive media-rich pages. To assist this job many plugins have been developed known as Gutenberg plugins.
Now let us start with the steps we need to take to add a new post in WordPress using the Gutenberg editor. There are no clumsy tasks, just a few simple steps. Just follow the process and we are ready to work with the Gutenberg block editor.
Difference between classic editor and Gutenberg editor
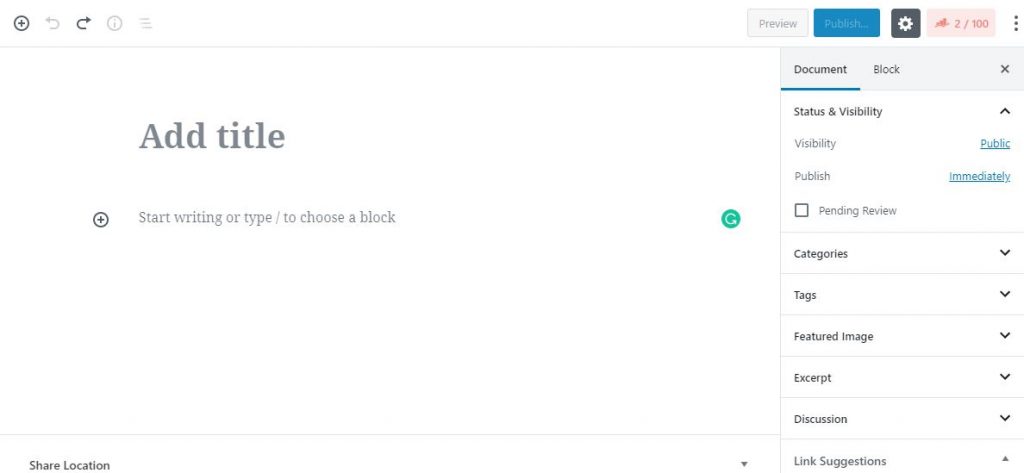

There is a huge difference between classic or default WordPress editors and Gutenberg editors. The inbuilt editor is called the TinyMCE editor. We can see the difference between them in the adjoined pictures. Besides the appearance, the actual difference is Gutenberg’s block editing approach.
In the TinyMCE editor, there is a single box structure where we have to add everything like text, images, videos, buttons, etc. Where Gutenberg editor has different blocks for every part. And because of that feature, we can easily customize or personalize every block separately. In this way, it becomes easy to add a new post in WordPress using the Gutenberg editor.
Gutenberg editor interface
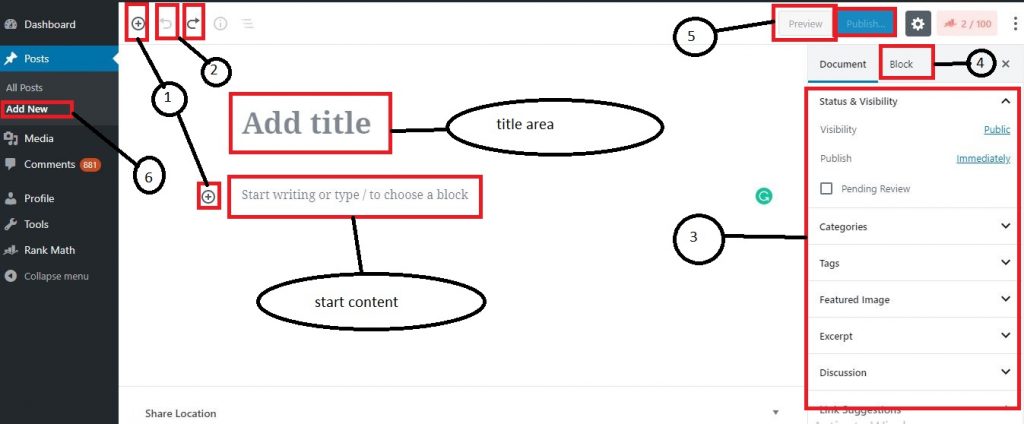
Here we can see different parts and functions of the Gutenberg editor interface.
- Add new blocks
- Undo-Redo and forward-backward buttons
- Sidebar with different editors for adding categories featured image, date.
- Customize specified block
- Preview and publish and drafts
- Add new post
Blocks of the Gutenberg editor
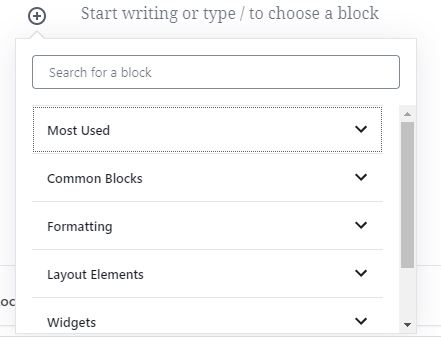
There are different blocks in this editor categorized on the basis of the functions. We need to have good knowledge about the blocks present in the editor to add a new post in WordPress using the Gutenberg editor perfectly. We can find them in the add blocks button, they are;
Common Blocks
For general texts and multimedia files.
- Paragraph
- list
- heading
- Gallery
- Quote
- Table off contents
- Audio
- Cover
- File
- Video
Formatting Block
For appearance design
- Classic
- Code
- Custom HTML
- Preformatted
- Pullquote
- Table
- Verse
Layout Block
For layout design
- Spacer
- Button
- Separator
- Column
- Group
- Media text
- More
- Page Break
Widgets
- ShortCode
- Archive
- Calendar
- Categories
- Latest comments
- latest post
- RSS
- Search
- Tag cloud
Embeds
For adjoining links and embedding social media
- Embeds
- WordPress
- Sound Cloud
- Spotify
- Flickr
- Vimeo
- Animoto
- Cloudup
- CrowdSignal
- Dailymotion
- Hulu, etc.
WooCommerce
For WooCommerce website design
- By category
- HandPicked
- Best Selling
- Newest
- sale
- top rated
- Featured
- By attribute
Yoast block
- FAQ
- How to
All we can see is in the Add block.
Steps to follow
1. Login into dashboard
The first step is to open the dashboard. That is to log in to our page.
2. Click on the post and select Add New
After we have opened our website dashboard, we will see the main page with lots of options. Among them, we have to click on Posts and then Add New.
3. Add title
We need to give a title to our post in the Add Title area.
4.. Create Content
If our post content is text only then we simply have to write the paragraph in the start writing area and then preview and publish it. For changing the paragraph simply press enter key on the keyboard. Gutenberg has a default setting for every new paragraph.
5. Add blocks
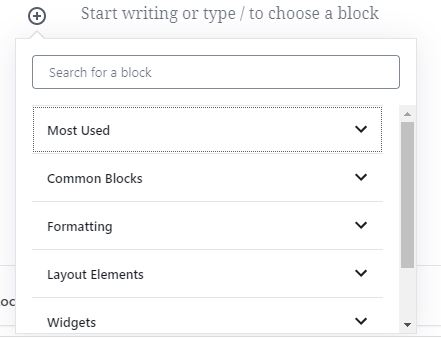
In most cases, our posts contain more than simple plain texts. There may be multimedia content, or widgets, or links, or layout elements, etc. We can add blocks by clicking on the Add block button.
The best part of the Gutenberg editor is the block editing. We can find a block for almost every type of content. If we are having trouble finding the exact block for our purpose, we can find them using the search area.
We can add as many blocks as we need in our post, just we need to keep adding and editing. If we need to modify the specific block, there is a menu for that as seen in the picture.
So take advantage and build an awesome page with media-rich elements. This will help to attract more and more users and reach the final motto.
6. Final Editing

Final editing includes the procedures of balancing rank math, adding tags, permalinks, visibility, adding links, featured images, publishing date, etc. We can find all of those in the sidebar.
This comes after the completion of the main body of the blog. And for better SEO and search rankings, it is necessary to do so.
7. Save and Publish
After the actual completion of the blog that is final documentation and editing, we can save the blog and publish it. This will conclude the full process to add a new post in WordPress using the Gutenberg editor.
Conclusion
Hence following the above steps we can successfully add a new post in WordPress using the Gutenberg editor. If you are in any confusion, feel free to ask. We will try to help you in every possible way.
I hope you got what you came for. Please keep visiting for similar posts and assistance.

